Both the Outlook.com web app and Microsoft Outlook provide options to delay email delivery so that you can undo them just in case you change your mind after clicking the Send button. Here’s how you can set it up.
How to set up undo send in the Outlook.com web app?
Outlook.com provides an undo-send feature. It works the same way as Gmail’s undo-send feature. Once enabled, after you have clicked the “Send” button, Outlook will display an “Undo” button for up to 10 seconds. If you click the “Undo” button, it stops Outlook from sending that email out. And if you don’t click the “Undo” button, the email will be sent as usual after a few seconds of wait time.
In the Outlook web app, click the Settings gear icon at the top right corner.
In the Settings window, go to Mail > Compose and reply. Scroll down until you see the Undo send. Choose how long you want the Outlook to wait before sending your emails. You can select up to 10 seconds.
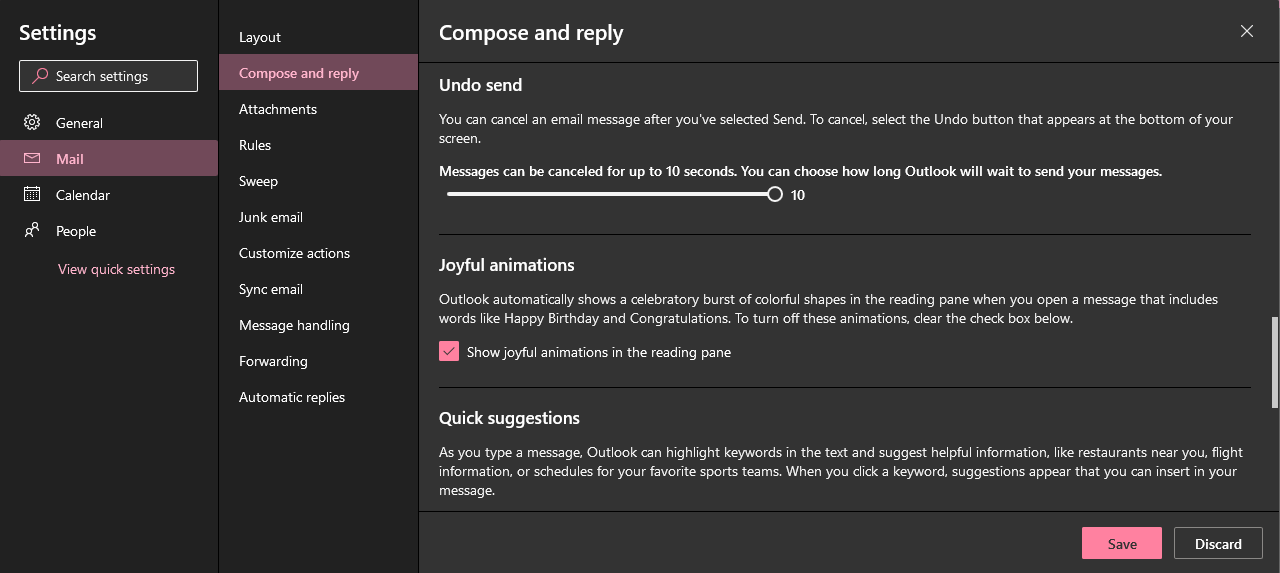
Once you have chosen the wait time, click Save and close the Settings window. That’s it. Now you will see an “Undo” button for a few seconds after you click “Send” on an email.
![]()
How to set up undo send on Microsoft Outlook?
This will take a bit more time to set it up because Microsoft Outlook provides more customization options. Go to File > Info > Manage Rules & Alerts.
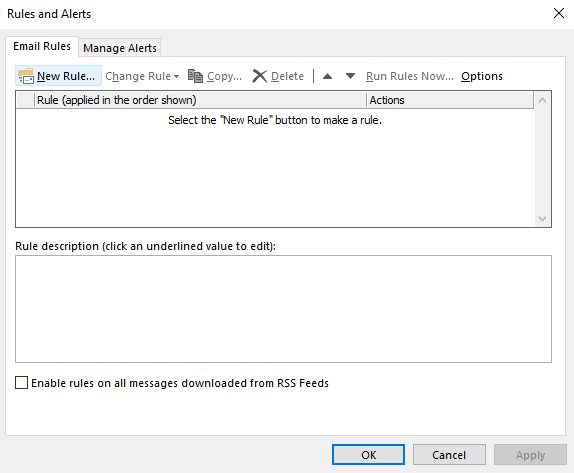
Rules and Alerts dialog box will appear. In the Email Rules tab, click New Rule.
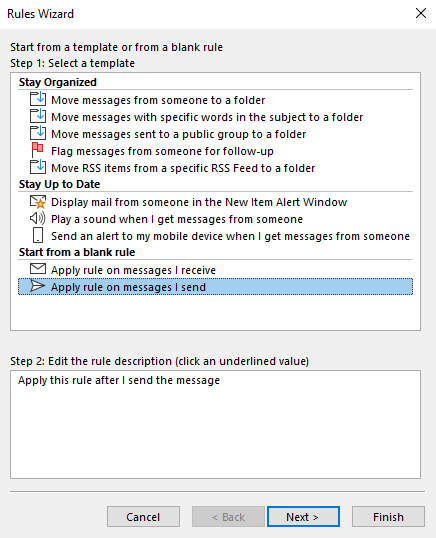
In the Rules Wizard dialog box, select Apply rule on messages I send and click Next.
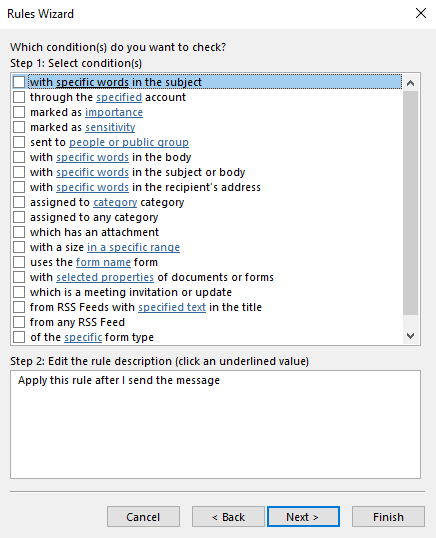
The Rules Wizard dialog box will then display a list of conditions. We don’t have to select any condition for this rule. Just click Next.
A confirmation dialog box will appear asking if you want to apply this rule to every message you send. Click Yes.

The Rules Wizard dialog box will now display a list of actions. In the Step 1: Select action(s) select defer delivery by a number of minutes.
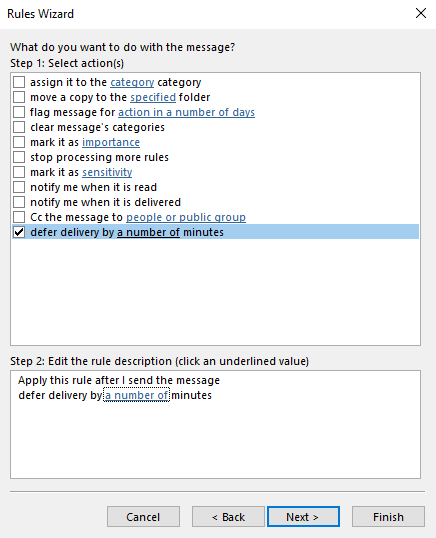
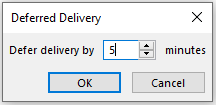
In the Step 2: Edit the rule description, click the underlined a number of and enter the number of minutes to delay the delivery of email messages. Once you have entered it, click OK.
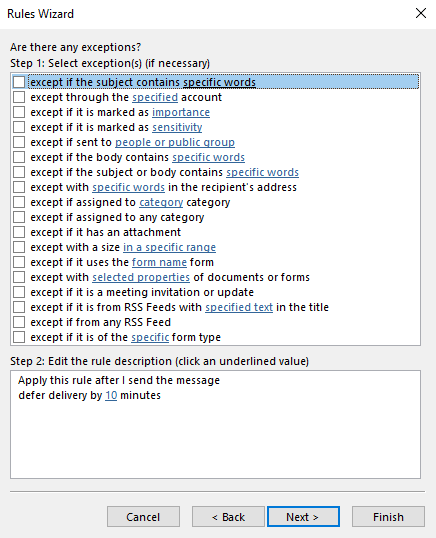
Check if the number of minutes you entered in the previous step has been saved in Step 2: Edit the rule description. Click Next. The Rules Wizard dialog box will now display a list of exceptions. We don’t have to select any exceptions for this rule. Just click Next.
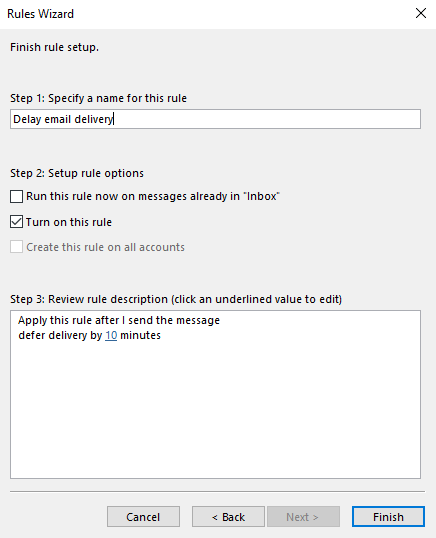
In the Finish rule setup, enter a name for this rule in the Step 1: Specify a name for this rule text box. Click Finish.
Finally, check if this new rule has been added to the list on the E-mail rules tab. Click OK.
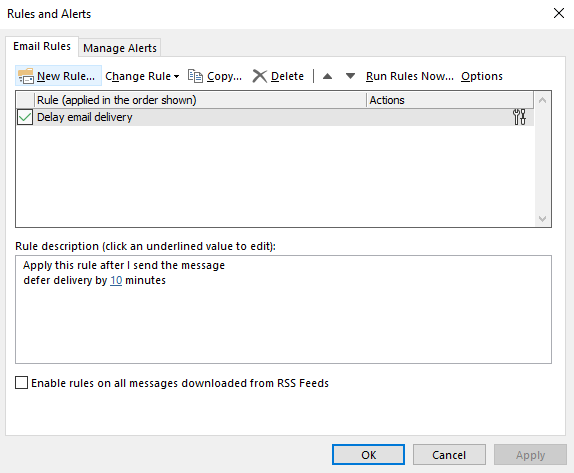
Now all emails you send from Microsoft Outlook will stay in the Outbox for the number of minutes you have specified in this rule. After that, they will be sent automatically.