An MTU (Maximum Transmission Unit) is the largest packet size transferred in your internet connection. Your internet’s TCP (Transmission Control Protocol) uses this MTU to determine the maximum size of each packet in any transmission.
If your connection’s MTU limit is set too high, it can lead to fragmented packets and packet loss.
Let’s learn how to find and set the appropriate MTU limit for your internet connection to ensure no packet losses occur.
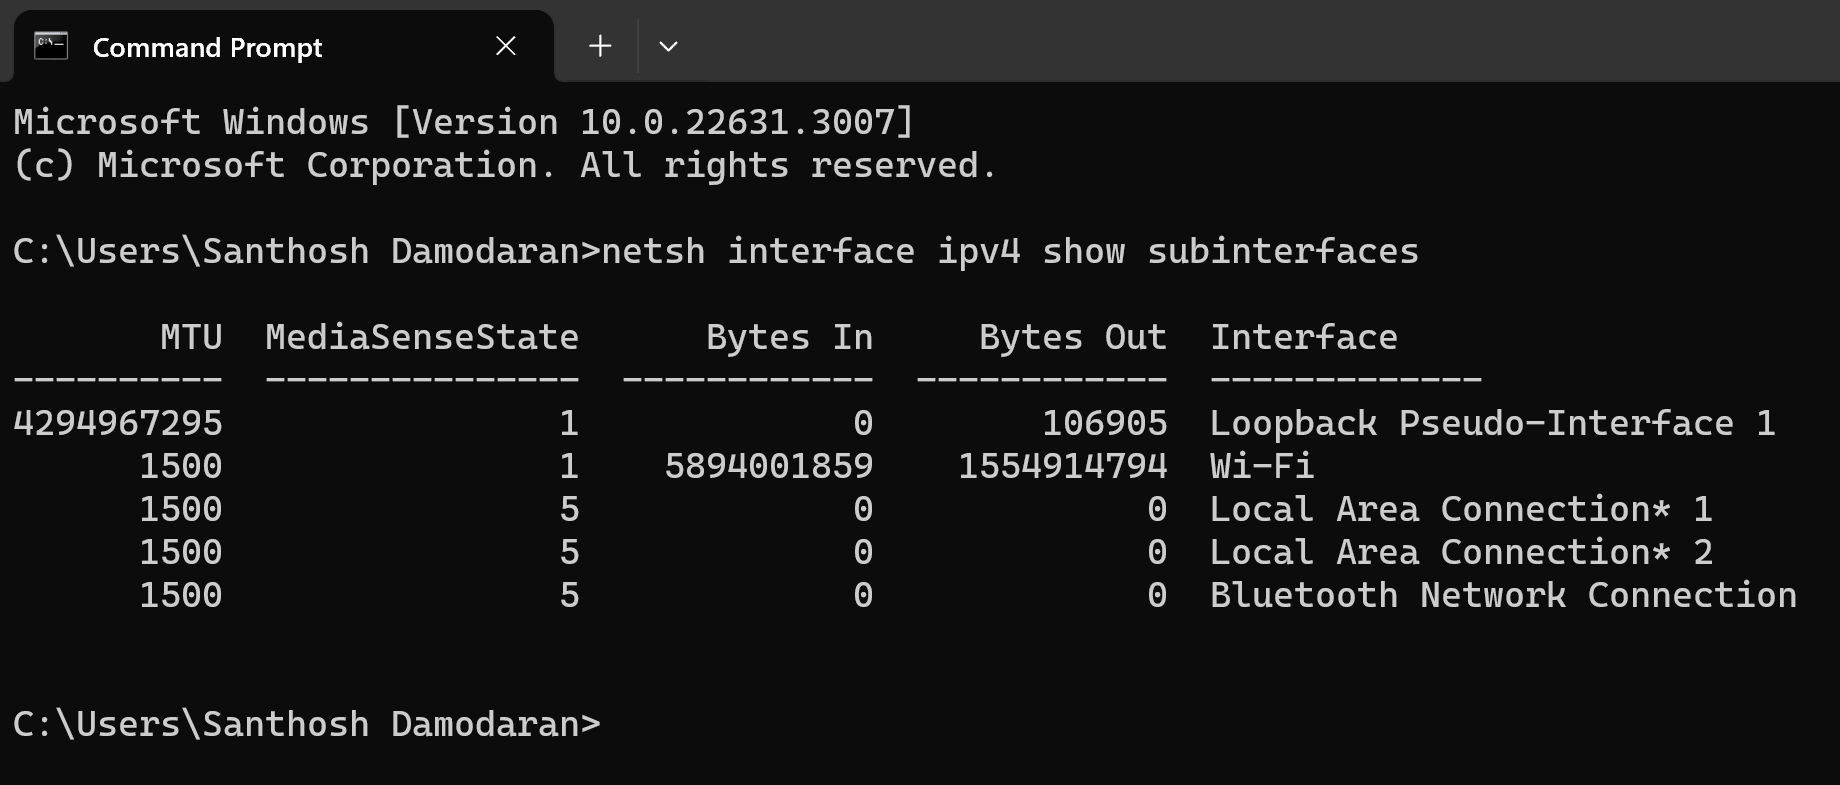
Open Command Prompt and type the following command.
netsh interface ipv4 show subinterfaces
Press Enter. You will get a list of all your network adapters installed on your computer. As you can see, MTU values are listed on the left.

All PPP (Point-to-Point Protocol) connections typically have a default MTU size of 1500 bytes, while VPN connections default to 1400 bytes.
To determine the optimal MTU size for your connection, use the ping command to test various MTU sizes, starting from the default and gradually decreasing. Find the most suitable MTU size with 0% packet loss.
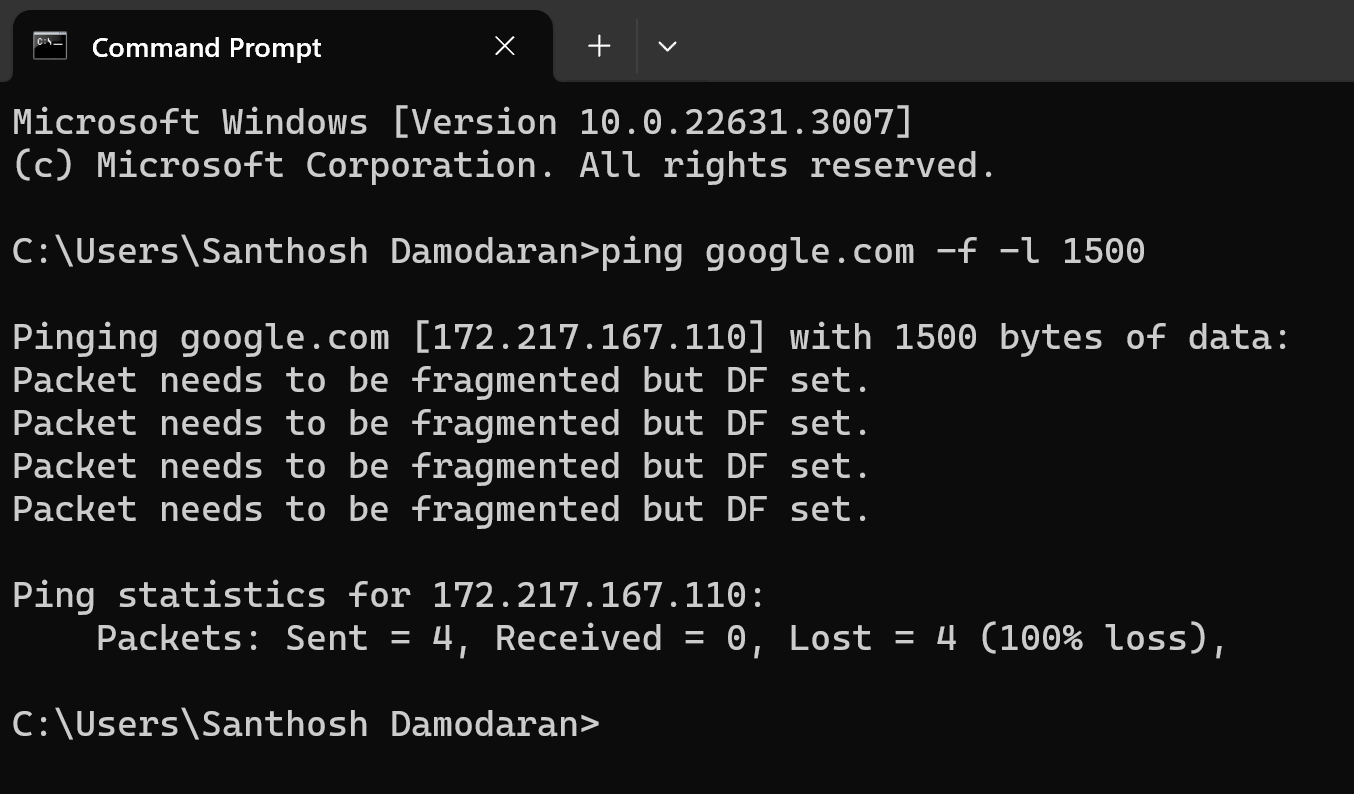
Open a separate Command Prompt and enter the following command to ping with a specific MTU size:
ping google.com -f -l 1500
The -f flag designates packets that should not be fragmented in the ping, while -l 1500 sets the packet size.

If you see packet loss as shown above, then your packets are getting fragmented.
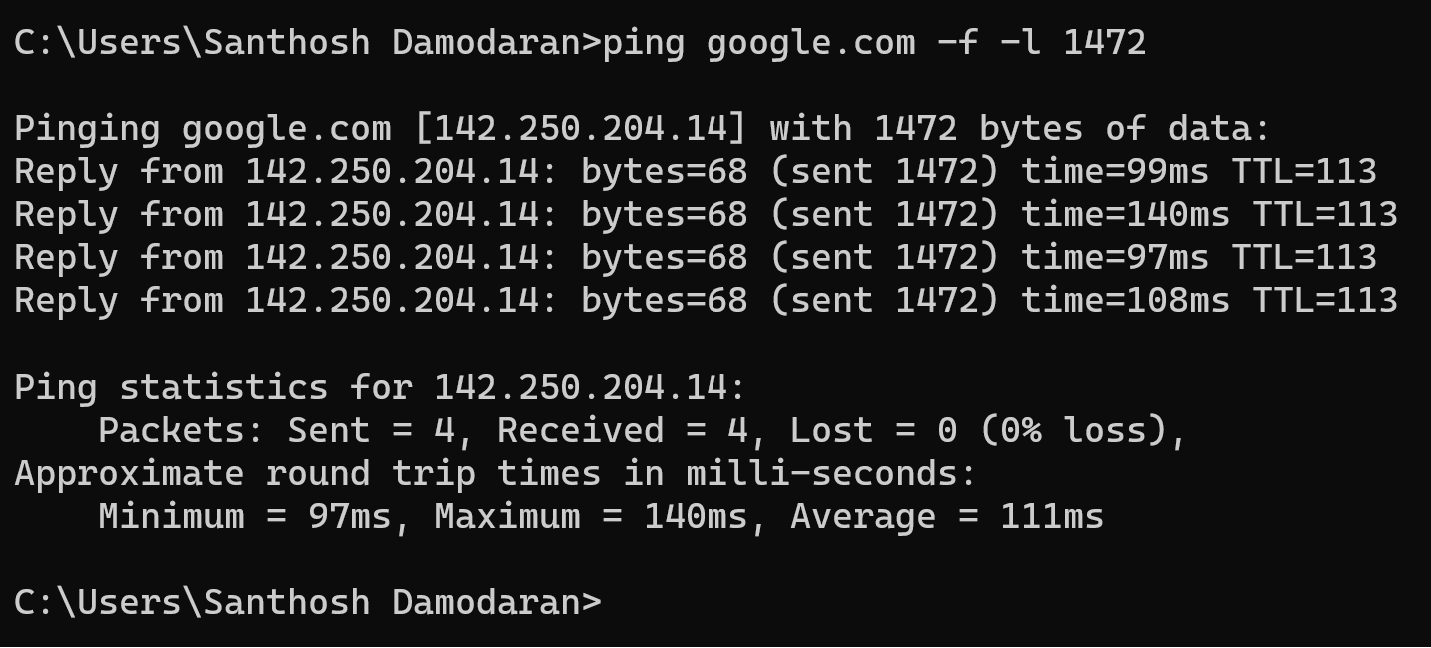
So, you have to experiment with different MTU values until you get a 0% loss.
In my case, the effective MTU size for my connection to be 1472. Test with different values, for instance, if 1472 fails, try 1462 or less. However don’t go below 1400.
Once you find the correct value with 0% loss, try incrementing the value by 1. For example, if 1472 is correct, then attempt 1473 and so forth until errors reoccur.

When you find a good MTU value, you can now set the MTU limit with this value.
To set your new limit, in an elevated command prompt (Run as administrator) use the following commands.
For a wired connection, type the following command:
netsh interface ipv4 set subinterface "Local Area Connection" mtu=1472 store=persistent
(Adjust the interface name based on your current connection. If you are connected via “Local Area Connection 2,” use this name instead, and so forth.)
For a wireless connection, use the following command:
netsh interface ipv4 set subinterface "Wi-Fi" mtu=1472 store=persistent
Ensure the interface name is accurate. Use the exact name of your connection. You can list all interfaces using the command:
netsh interface ipv4 show subinterfaces
Once you have identified your connection name, use it to set the new limit for your connection. Enter the command, press Enter, and the MTU value will be set.
Note: To apply the changes, restart your PC. Some routers, like Netgear routers, allow you to set an MTU value in the WAN settings. You can input your value there as well.

My wireless connection experienced packet loss before, but after adjusting the MTU limit, I now have 0% packet loss, making web browsing a breeze.